Part 2. Clock-in/out System: Basic backend (I) - AuthModule
• • 8 min readThis post is part of a Series of post which I'm describing a clock-in/out system if you want to read more you can read the following posts:
- Part 1. Clock-in/out System: Diagram.
- Part 2. Clock-in/out System: Basic backend - AuthModule.
- Part 3. Clock-in/out System: Basic backend - UsersModule.
- Part 4. Clock-in/out System: Basic backend- AppModule.
- Part 5. Clock-in/out System: Seed Database and migration data
- Part 6. Clock-in/out System: Basic frontend.
- Part 7. Clock-in/out System: Deploy backend (nestJS) using docker/docker-compose
- Part 8. Clock-in/out System: Deploy frontend (Angular 2+) using environments
- Part 9. Testing: Backend Testing - Unit Testing
- Part 10. Testing: Backend Testing - Integration Testing
- Part 11. Testing: Backend Testing - E2E Testing
- Part 12. Testing: Frontend Testing - Unit Testing
- Part 13. Testing: Frontend Testing - Integration Testing
In the first post (Part 1. Clock-in/out System: Diagram) we described the different components of our clock-in/out system. So, if you don't understand the architecture of the system you can read that post because I've described each component of the system.
In this post, I'm going to describe the basic backend using NestJS. The first step is understand which is the directory structure. If you use the NestJS starter project to start a project you could to do the following steps:
$ git clone https://github.com/nestjs/typescript-starter.git server
$ cd server
$ npm install
$ npm run start
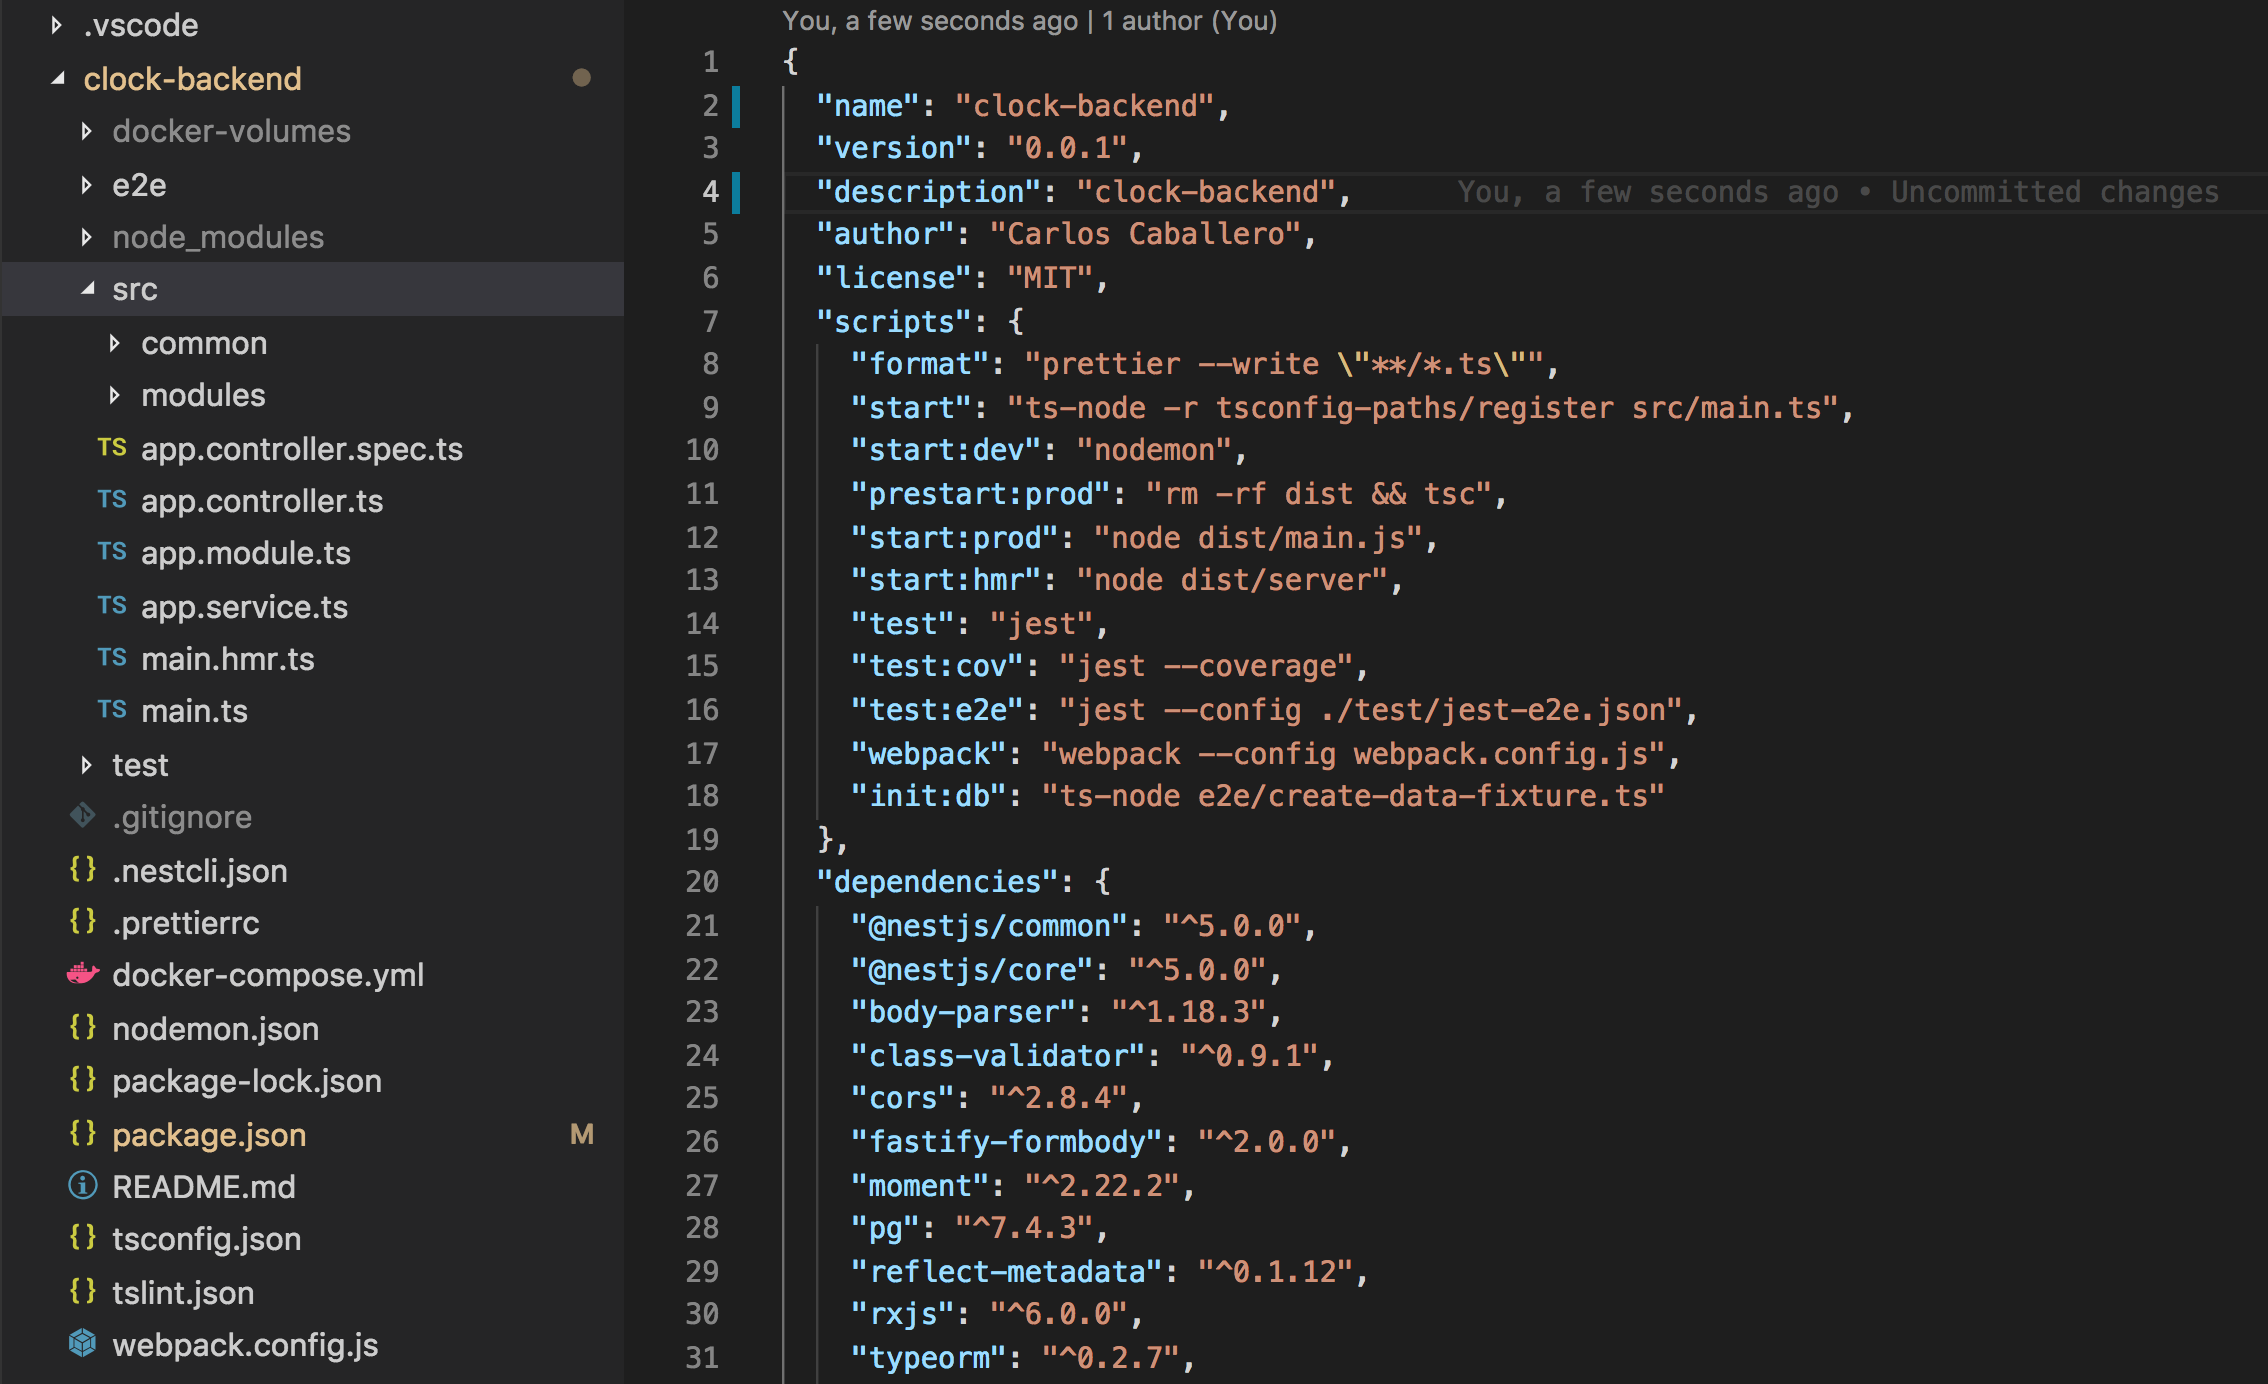
After that, we need create our own modules structure inside src directory as you can see in Figure 1.
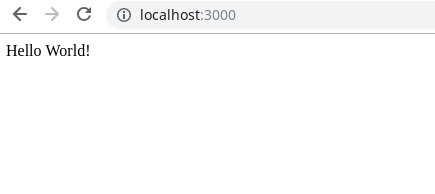
In this moment the server is running in port 3000 and the endpoint http://localhost:3000/ using the verb GET is working. If you navigate on this address you get a message of Hello World as shown in Figure 2.
List of modules of the backend
The next step is define which are the modules need to our backend:
- DatabaseModule: This module is used to shared the database connection between different modules.
- AuthModule: This module is used to register in the database when an user clock-in and clock-out. The service AuthService will be the responsible for save in the database when an user check-in and check-out. This module there are not accesible since external. So, there are not a controller to communicate using API.
- UserModule: This module is used to manage the user information. The service UserService provide two important methods: 1. getUsersWithoutKey; 2. addUser. These method are used to know that user have not a valid ID Card and add an user to the system.
- AppModule: This module is the main module which will be communicate with the frontend. In this module the others modules will be imports, so the services of these modules can be used in this module. The main controller in this module have the following endpoints:
- POST: /in: This endpoint call the method authIn from the AuthService.
- POST: /out: This endpoint call the method authOut from the AuthService.
- GET: /users: This endpoint call method getUsersMustBeWorkingNow from the UsersService and combine the information together the timestamp of the server.
DatabaseModule
The module database is used to shared the DatabaseConnection. We're using TypeORM as ORM which is integrated perfectly in NestJS. So the definition of our database.module is the following:
database.module.ts
import { Module } from '@nestjs/common';
import { databaseProviders } from './database.providers';

@Module({
  providers: [...databaseProviders],
  exports: [...databaseProviders],
})
export class DatabaseModule {}
In the provider we're defining our DbConnectionToken using a factory. In our case we're using Postgres as database. So, the most interesting part is the definition of entities which are automatically detect in TypeORM. Although NestJS include a specify module to manage TypeORM connection, I prefer configure the provider using directly the method createConnection from typeorm library.
In this point, we must to install the following libraries in node:
npm i typeorm pg
database.providers.ts
import { createConnection } from 'typeorm';
export const databaseProviders = [
  {
    provide: 'DbConnectionToken',
    useFactory: async () =>
      await createConnection({
        type: 'postgres',
        host: 'localhost',
        port: 5531,
        username: 'root',
        password: 'toor',
        database: 'clock',
        entities: [__dirname + '/../**/*.entity.{ts,js}'],
        synchronize: true,
        logging: 'all',
      }),
  },
];
So, the next step is install a database Postgres in your machine but I think that the use of Docker is better option because you can get a clean environment to develop which will be the same when you deploy.
So, the docker-compose in which you will be a container called PostgreTestClock using the port 5531 is the following:
docker-compose.yml
version: '2'
services:
  PostgreSQL:
    container_name: PostgreTestsClock
    image: postgres:10-alpine
    ports:
      - '5531:5432'
    environment:
      - POSTGRES_USER=root
      - POSTGRES_PASSWORD=toor
      - POSTGRES_DB=clock
    volumes:
      - ./docker-volumes/postgresql:/var/lib/postgresql
So, to start the database of the system only run the command docker-compose up. This module will be used by other modules to connect to the database.
AuthModule
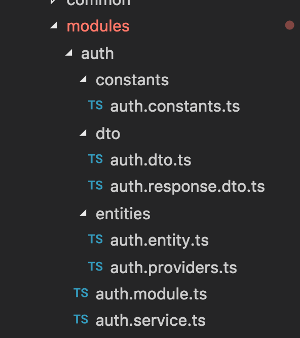
The second module that we have implemented is AuthModule, this module have the structure show in the Figure 3. You can note that there are several directories as constants, DTOs and entities which are used to organised a module independently as a service. The idea is build as module as a service because any day you could build microservices. However, in this project all modules are relation between them because is architecture is very complex to this project.
In the definition of auth.module you can see that imports DatabaseModule and UsersModule. The DatabaseModule is used to connect to the database (show previously) and the UsersModule is used to check information about the users in the AuthModule. In this moment, the module UsersModule is still under development (following post). The service AuthService is exported because the future AppController will use this service.
auth.module.ts
import { Module } from '@nestjs/common';
import { DatabaseModule } from '../database/database.module';
import { AuthService } from './auth.service';
import { AuthProviders } from './entities/auth.providers';
/*import { UsersModule } from '../users/users.module'; */

@Module({
  imports: [DatabaseModule/*, UsersModule */],
  providers: [AuthService, ...AuthProviders],
  controllers: [],
  exports: [AuthService],
})
export class AuthModule {}
Entity
The next step is know that information is saved in the database. That's define using the file user.entity.
auth.entity.ts
import { Entity, Column, PrimaryGeneratedColumn, ManyToOne } from 'typeorm';
/*import { User } from '../../users/entities/user.entity';*/
@Entity()
export class AuthEntity {
  @PrimaryGeneratedColumn()
  id_key: number;
  @Column()
  reader: string;
 /* @ManyToOne(() => User, user => user.key)
  user: User;*/
  @Column({
    nullable: false,
  })
  timestamp: number;
}
The fields the class AuthEntity are the following:
- id_key: That's the UID's table. This field is generated automatically by TypeORM.
- reader: That's the device which send the user's key. In this project there are two readers - Input and Output.
- user: That's the relation between Auth and User. In TypeORM you can use the decorator @ManyToOne to define that there are several entries in authentication for each user. The relation is doing using the field key of the user. In the User entity is required define the field key with the inverse decorator (@OneToMany). In the following post we will describe this module (at the moment is commented).
- timestamp: This is the moment in unix timestamp that the input or output was done. So, that's very important because we need know the exact moment which the user clock-in/out in the system.
Finally, the provider file export two repositories to fast access to the database. The pattern used is the Repository. So, you can inject those providers using their token (AUTH_REPOSITORY_TOKEN and USER_REPOSITORY_TOKEN) in any service or controller.
auth.providers.ts
import { Connection } from 'typeorm';
import { AuthEntity } from './auth.entity';
import {
  AUTH_REPOSITORY_TOKEN,
  DB_CONNECTION_TOKEN,
  USER_REPOSITORY_TOKEN,
} from 'common/config/database.tokens.constants';
/*import { User } from '../../users/entities/user.entity';*/

export const AuthProviders = [
  {
    provide: AUTH_REPOSITORY_TOKEN,
    useFactory: (connection: Connection) =>
      connection.getRepository(AuthEntity),
    inject: [DB_CONNECTION_TOKEN],
  },
  {
    provide: USER_REPOSITORY_TOKEN,
    useFactory: (connection: Connection) => connection.getRepository(/*User*/AuthEntity),
    inject: [DB_CONNECTION_TOKEN],
  },
];
Constants and DTOs
Now, I'm going to show the most easy part of my code but very important. The constant file and the DTO. The constant file is very useful when you want to coding clean code (is a good practice don't use strings or numbers in your code) and the DTOs define the information which is exchange between client-side and server-side.
The auth.constant file only have STATUS_CODE_RESPONSE to the Arduino system which understand 0 as KO and 2 as OK and several moment formats.
auth.constant.ts
export const STATUS_CODE_RESPONSE = {
  OK: 2,
  KO: 0,
};

export const INPUT = 'input';
export const OUTPUT = 'output';

export const DAY_FORMAT = 'MM/DD/YYYY';
export const HOUR_FORMAT = 'HH';
export const DAY_WITH_HOUR_FORMAT = 'MM/DD/YYYY HH';
The following DTOs are very simple because only show the interface of an input (AuthDto) and an output (AuthResponseDto).
auth.dto.ts
export class AuthDto {
  readonly key: string;
  readonly reader: string;
}
auth.response.dto.ts
export class AuthResponseDto {
  readonly status: number;
  readonly msg: string;
}
Service
The AuthService should has two important methods:
- authIn: This method received a signal from the Arduino and save the information when a user clock-in in the system. The service response with a welcome message.
- authOut: This method received a signal from the Arduino and save the information when a user clock-out in the system. The service response with a bye message.
The code of this methods are the following:
auth.service.ts
...

@Injectable()
export class AuthService {
  constructor(
    @Inject(AUTH_REPOSITORY_TOKEN)
    private readonly authRepository: Repository< AuthEntity >,
    @Inject(USER_REPOSITORY_TOKEN)
    private readonly userRepository: Repository< User >,
  ) {}

  async authIn(auth: AuthDto): Promise< AuthResponseDto > {
    try {
      const user = await this.saveTicketing({ ...auth, reader: INPUT });
      return this.welcomeTeacher(user.name);
    } catch (e) {
      return { status: STATUS_CODE_RESPONSE.KO, msg: 'Error Input' };
    }
  }
  async authOut(auth: AuthDto): Promise {
    try {
      const user = await this.saveTicketing({ ...auth, reader: OUTPUT });
      return this.byeTeacher(user.name);
    } catch (e) {
      return { status: STATUS_CODE_RESPONSE.KO, msg: 'Error Output' };
    }
  }
  ...
}
In this class, I've inject two repositories (authRepository and userRepository) which are used to communicate with database. The code is clean because I've used simple async/await and private methods (saveTicketing, welcomeTeacher and byeTeacher). So, the methods authIn and authOut are simple to testing in the future. The response of the both methods is an AuthResponseDto.
The private method saveTicketing is very simple too, the first step is get the user which the key is associated (auth.key come from the Arduino). After, you can save the information of authentication:
- key and reader from auth.
- user from the database (UserEntity).
- timestamp which is calculated from the library momentJS.
auth.service.ts

  private async saveTicketing(auth: AuthDto): Promise {
    const user = await this.userRepository.findOne({
      where: {
        key: auth.key,
      },
    });
    await this.authRepository.save({
      ...auth,
      user,
      timestamp: moment().unix(),
    });
    return user;
  }
Finally the two methods which show the message to the user (that's show in the Arduino screen) are the followings:
auth.service.ts
   private welcomeTeacher(nameTeacher) {
    return {
      status: STATUS_CODE_RESPONSE.OK,
      msg: `Input - ${nameTeacher}`,
    };
  }
  private byeTeacher(nameTeacher) {
    return {
      status: STATUS_CODE_RESPONSE.OK,
      msg: `Output - ${nameTeacher}`,
    };
  }
Finally, if you want to see the complete code of AuthService is the following:
auth.service.ts
import { Injectable, Inject } from '@nestjs/common';
import { Repository, getRepository } from 'typeorm';
import {
  AUTH_REPOSITORY_TOKEN,
  USER_REPOSITORY_TOKEN,
} from 'common/config/database.tokens.constants';
import { AuthEntity } from './entities/auth.entity';
import { AuthDto } from './dto/auth.dto';
import { AuthResponseDto } from './dto/auth.response.dto';
import {
  STATUS_CODE_RESPONSE,
  INPUT,
  OUTPUT,
} from './constants/auth.constants';
import * as moment from 'moment';
import { User } from '../users/entities/user.entity';
@Injectable()
export class AuthService {
  constructor(
    @Inject(AUTH_REPOSITORY_TOKEN)
    private readonly authRepository: Repository,
    @Inject(USER_REPOSITORY_TOKEN)
    private readonly userRepository: Repository,
  ) {}

  async authIn(auth: AuthDto): Promise {
    try {
      const user = await this.saveTicketing({ ...auth, reader: INPUT });
      return this.welcomeTeacher(user.name);
    } catch (e) {
      return { status: STATUS_CODE_RESPONSE.KO, msg: 'Error Input' };
    }
  }
  async authOut(auth: AuthDto): Promise {
    try {
      const user = await this.saveTicketing({ ...auth, reader: OUTPUT });
      return this.byeTeacher(user.name);
    } catch (e) {
      return { status: STATUS_CODE_RESPONSE.KO, msg: 'Error Output' };
    }
  }
  private async saveTicketing(auth: AuthDto): Promise {
    const user = await this.userRepository.findOne({
      where: {
        key: auth.key,
      },
    });
    await this.authRepository.save({
      ...auth,
      user,
      timestamp: moment().unix(),
    });
    return user;
  }

  private welcomeTeacher(nameTeacher) {
    return {
      status: STATUS_CODE_RESPONSE.OK,
      msg: `Input - ${nameTeacher}`,
    };
  }
  private byeTeacher(nameTeacher) {
    return {
      status: STATUS_CODE_RESPONSE.OK,
      msg: `Output - ${nameTeacher}`,
    };
  }
}
Resume
In this post I've explain my AuthModule which is very simple because I'm using clean code in my coding. This module is used to save the information about clock-in/out.
In the following post of this series I'm going to explain the UsersModule and AppModule.
The GitHub project is https://github.com/Caballerog/clock-in-out.
The GitHub branch of this post is https://github.com/Caballerog/clock-in-out/tree/part2-basic-backend-auth.