Build&Deploy Angular Apps in GitHub Pages using GitHub Actions
• • 8 min readIntroduction
In many times, an integration or deployment system is needed quickly and
effectively for our frontend applications. At other times, considerable time has been invested in the task of manually deploying our applications.
Nowadays, with the increase of commits and developers working on a software project, it is absolutely necessary to carry out this deployment automatically.
This article will introduce how to have a Build&Deploy system for
Angular applications using GitHub Actions and GitHub Pages. A prerequisite to follow this article is to have our application in the GitHub repositories.
1. Configure gh-pages
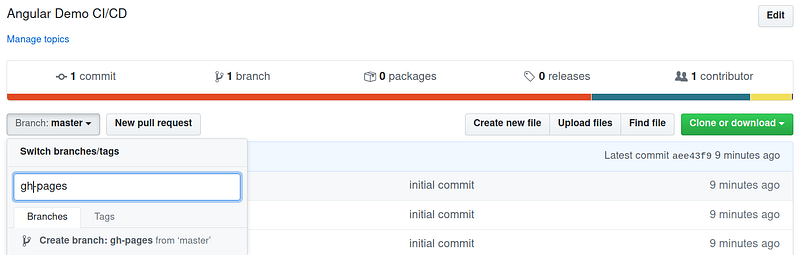
The first thing we need to do is have a branch configured where the static files will be served (html, css, js, images …). By default, GitHub has a branch called gh-pages linked to its static server that provides us with a domain in the following format https://<username>.github.io/<repository>. Therefore, the first thing we do is create the gh-page branch as shown in the following image.
We need to delete the files of our project since what will have to be in this repository are the files of our application after the build process. The steps to remove the files in the gh-pages branch are the following:
> git fetch origin gh-pages
> git checkout gh-pages
Branch 'gh-pages' set up to track remote branch 'gh-pages' from 'origin'.Switched to a new branch 'gh-pages'
Once that we are located in the appropriate branch, we only delete all the
files.
> git rm -rf .
> git add .
> git commit -m "remove files"
> git push
After these steps, your repository should be empty and then we are ready for the next step.
2. Setup an npm-script for deploy
The second step is to configure an npm script that allows us to perform the build operation instead of running this task from the terminal although Angular apps have an npm script related to the build operation. In our case, we need a more specific script in which it is specified that the build task will be done in production mode (--prod) and that the base address of our project will not be the root but the name of the repository --base-href=/<repository>/.
Therefore, we go back to the master branch and proceed to configure the
package.json file by adding the following npm script:
git checkout master
We edit the package.json file.
“deploy”: “ng build --prod --base-href=/angular-ci-cd/”
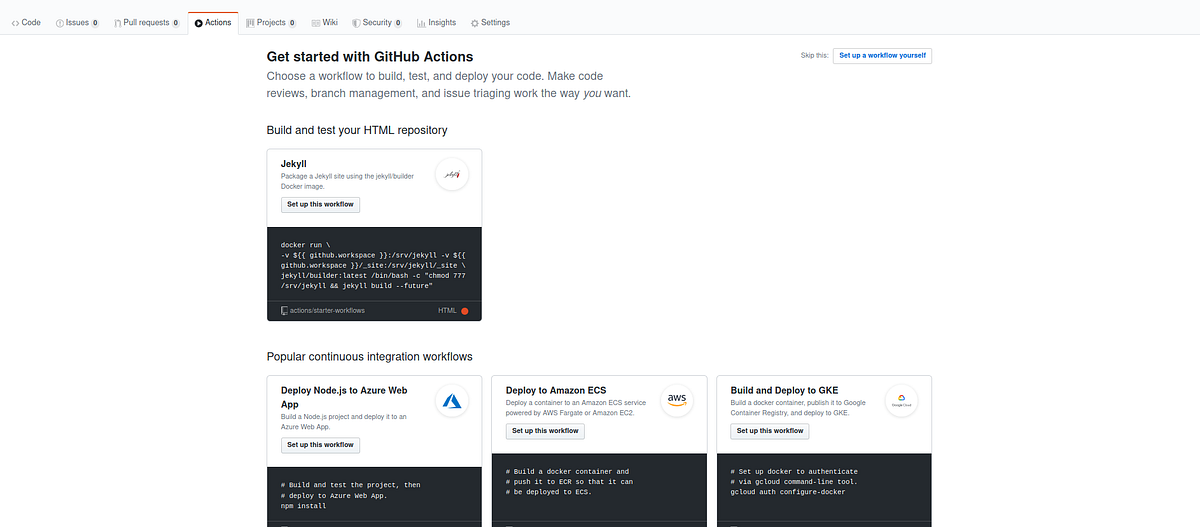
3. GitHub Actions
This is the most interesting step of this article since it is in which we are going to make use of the own tool of GitHub, GitHub Actions. To do so, go to the Actions tab in GitHub. You will see several templates to
start then.
GitHub Actions
These files are configurations in the .yml format. These files will be
automatically created in the .github/workflows directory. In our specific case we will create a file called build-deploy.yml that will have the following content:
name: Build and Deploy

on:
  push:
    branches:
      - master
jobs:
  build-and-deploy:
    runs-on: ubuntu-latest
    steps:
    - name: Checkout
      uses: actions/checkout@v1
    - uses: actions/setup-node@v1 #this installs node and npm for us
      with:
        node-version: '10.x'
    - uses: actions/cache@v1 # this allows for re-using node_modules caching, making builds a bit faster.
      with:
        path: ~/.npm
        key: ${{ runner.os }}-node-${{ hashFiles('**/package-lock.json') }}
        restore-keys: |
          ${{ runner.os }}-node-
    - name: Build
      run: |
        npm install
        npm run-script deploy
    - name: Deploy
      uses: JamesIves/github-pages-deploy-action@releases/v3
      with:
        GITHUB_TOKEN: ${{ secrets.GITHUB_TOKEN }}
        BRANCH: gh-pages
        FOLDER: dist/angular-ci-cd
Let's begin to understand this file and what is being done. If you have worked previously with the .YML/.YAML file, you will already know that you must be very strict with blank or tabulated spaces since if the file is missing perfectly aligned or if you combine blank and tabulated spaces you will find problems.
- name: The name of the action to be able to identify it from other actions that we configure.
- on: When should the action be triggered? In our case,
we only want the build and deploy process to be done when a
push operation on themasterbranch is done. Observe that for that purpose we have created different levels of indentation in thebuild-deploy.ymlfile. Although it is not the goal of this post, this trigger parameter allows us to build a CI system (Continuous Integration) in which the tests of our application could be executed for any Pull Request. - jobs: This section defines the tasks that will be carried out
in our action. Different tasks can be defined in one
action. In our specific case we only need to configure a single
task that we will call build-and-deploy. In this section is where you have to define each step in the task. Therefore, we define it in greater detail below.
Jobs
The first element that is necessary to define a task is to assign a
unique identifier or name, in this specific case it is build-and-deploy. The tasks can be executed in different environments, this is described using the runs-on section that, in our case, only one environment has been defined of execution since the task is to build and deploy our
application. In the event that you want to configure test environments, this label is very interesting since it allows you to configure different environments in which will run the battery of tests on the application.
Steps
The next item in our .YML file is the sequence of steps that
performs the action that is being configured. The task we are configuring
It is made up of three steps, which are as follows:
- Checkout.
- Build.
- Deploy.
1. Checkout
One of the most powerful features of GitHub Actions is that it allows
use actions created by third parties. I mean, if you always
we carry out the same steps we can parameterize and reuse them (that's a matter from another article different from this one). If we want to use a third party action we have to use the keyword uses, as shown in the
code.
- name: Checkout
  uses: actions/checkout@v1
In this task we are using the actions/checkout@v1 which is
find here: https://github.com/actions/checkout
What do we do in this task? Well, it is simple, this action performs the operation check-out from our repository on the GitHub workspace. I mean, we are performing the command git checkout in the workspace of our GitHub Actions. Thus, we have full access to the following steps of
our flow.
2. Build
The next step is to build our Angular application, exactly the same as we would do if we did it manually. So, we should install the dependencies using npm install and after should run the npm-script that we have configured for the building our application: npm run-script build. Therefore, the step called Build would be composed of these two steps, which we can describe using the run tag of GitHub Actions.
- name: Build
  run: |
        npm install
        npm run-script build
3. Deploy
The last step is to perform the deploy of the application. The deploy of our application is quite simple because we only have static files (html, css and .js) once we have completed the build phase of An Angular application. Therefore, all we have to do is copy to adapt our application to GitHub Pages. This task is always the same mode, perhaps changing some settings. Therefore we will use of a third-party action that considerably facilitates the task: https://github.com/JamesIves/github-pages-deploy-action
In this action, it is important that we have to configure a TOKEN of
security to access the repository. There are different ways to display
our applications using the GitHub API:
- SSH: using a deploy key (Deploy Key).
- ACCESS_TOKEN: generating a secret key for a personal account
GitHub, this must be done by creating a secret from the configuration panel from GitHub. - GITHUB_TOKEN: GitHub automatically creates a secret
calledGITHUB_TOKENto use in the workflow.
We will use GITHUB_TOKEN for our deployment since it will be done from the GitHub itself to GitHub Pages therefore, we delegate the responsibility for security to the GitHub itself.
The following parameters that must be configured to deploy successfully in GitHub Pages are the branch (BRANCH) where you want deploy the code (gh-pages) and the directory (FOLDER) where the code is located.
The action to deploy (Deploy) is as shown below:
- name: Deploy
  uses: JamesIves/github-pages-deploy-action@releases/v3
  with:
      GITHUB_TOKEN: ${{ secrets.GITHUB_TOKEN }}
      BRANCH: gh-pages
      FOLDER: dist/angular-ci-cd
Bonus
Using the previous steps it is enough to deploy our application. However, we may want to configure two extra steps that allow us to improve our workflow. An interesting configuration is that of require a specific version of node and/or have a cache of the node packages that have been previously installed so you don't have to install them on every build.
Therefore, the two steps that we need to configure are the following:
- setup-node.
- cache.
- uses: actions/setup-node@v1
  with:
  node-version: '10.x'
- uses: actions/cache@v1
  with:
    path: ~/.npm
    key: ${{ runner.os }}-node-${{ hashFiles('**/package-lock.json') }}
    restore-keys: |
       ${{ runner.os }}-node-
In the example above, the node 10 version has been selected, and the
cache files have followed the instructions of the action [https://github.com/actions/cache] (https://github.com/actions/cache) where
according to the development language, it describes which files should be cached.
4. Verification
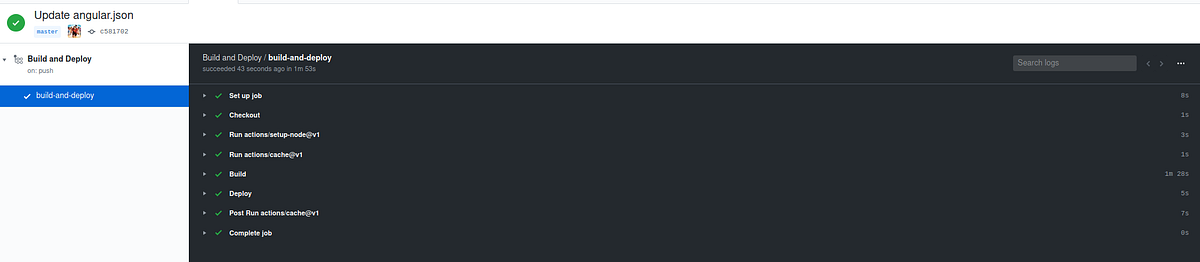
Finally, we would have to check that the Build&Deploy is being carried out, for this we move to the GitHub Actions tab where the workflow is shown.
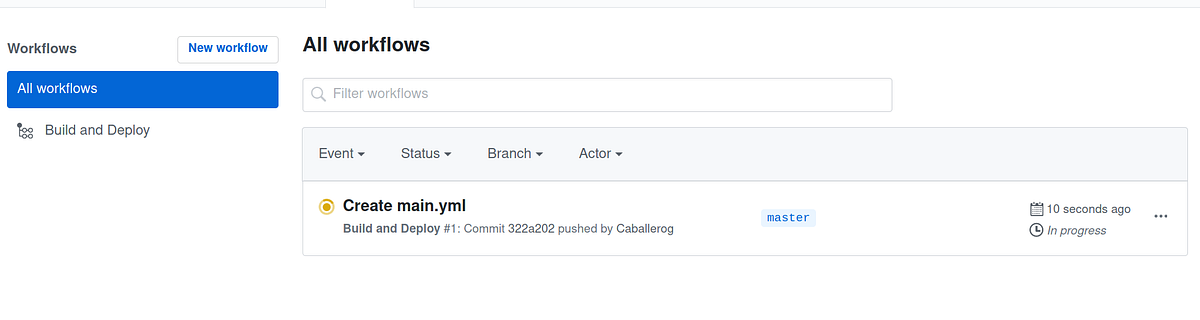
If we navigate to the different panels we can see the log of each of
tasks:
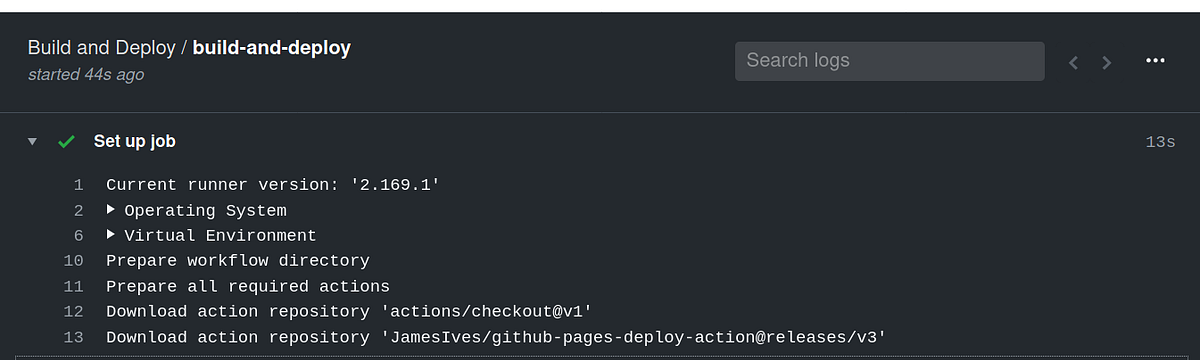
Here, you should see that all the steps have been done satisfactorily.
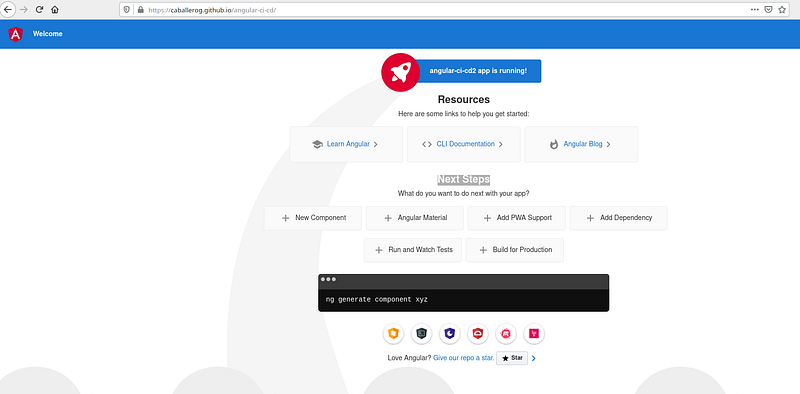
Finally, we find our application in the URL: https://<user>.github.io/<repository>. In our case, We have the application deployed on this route:
https://caballerog.github.io/angular-ci-cd/
Conclusions
In this post, we have presented a quick and easy way to have configured a Build&Deploy system for Angular applications using GitHub Actions and GitHub Pages. The concepts learned in this article are transferable to any other continuous integration system.
Before using GitHub Actions and GitHub Pages, I've been deploying for months using DroneCI to a private static server and the concepts
learned from that experience have been transferred to this system of
continuous integration without any problem. Therefore, the concepts learned in this article can be easily transferred to other tools.
As of now, there is no excuse to deploy your applications in Angular from
easy and fast way. Also, it works perfectly with private repositories.